
Blemish Removal Without That Airbrushed Look (What's New in Camera Raw 18.5)
Adobe Camera Raw 18.5 landed this week, right alongside the Lightroom 9.5 update. If you use ACR through Photoshop or Bridge (which requires the Photography or Creative Cloud Pro plan), here's what's new in this release.
Vectorscope Gets More Flexible
The vectorscope debuted two versions ago in 18.4, and we have been refining it steadily since. This update adds three real improvements:
Color wheel rotation. By default, red sits around the 11 o'clock position on the vectorscope. Right-click and you can now choose "Show Red at 3 O'Clock," which rotates the wheel so red lines up with the color grading wheel's orientation. If you've worked in video and are used to seeing the color wheel that way, this just makes the two panels feel consistent instead of fighting each other.
Lab color readouts. With the histogram open, hovering over your image shows a readout pill with RGB values. Right-click that pill and you can switch it to Lab values instead. This also works with just the vectorscope open on its own.
Color sampler tool. Grab the dropper, click on different areas of your photo, and each sampled point shows up as a plotted dot on the vectorscope. It's a fast way to see exactly where specific colors in your image fall relative to the color clusters, useful for checking skin tones or matching colors across a series of shots.
Render to DNG: A Real Time-Saver for Generative Expand
This feature also showed up in Lightroom 9.5, and it solves a specific problem with Generative Expand: expand only works with pixels that exist in the current crop, but your original raw file still has all the surrounding pixels sitting underneath.
Say you crop tight on a subject, cutting out a cluttered background, and then want to expand that crop into a square or a 16:9 frame with copy space. Normally the original background pixels are still there behind the crop, which throws off what Gen Expand generates. Render to DNG solves this by baking your current edits, including the crop, into a new file. It creates a TIFF wrapped in a DNG container (not a true raw DNG, so raw-specific tools won't apply to it), and drops it right next to your original.
Once you've rendered a copy, you can run GenExpand on it and it only has your cropped pixels to work from. No stray studio equipment or background clutter creeping back in. You could get the same result by manually exporting to TIFF and reimporting, but Render to DNG does it in one step and keeps the new file in the same folder automatically.
It's also handy anytime you want to hand off a "baked" file to someone else without sharing your edit settings or your original raw.
Blemish Removal Comes to ACR
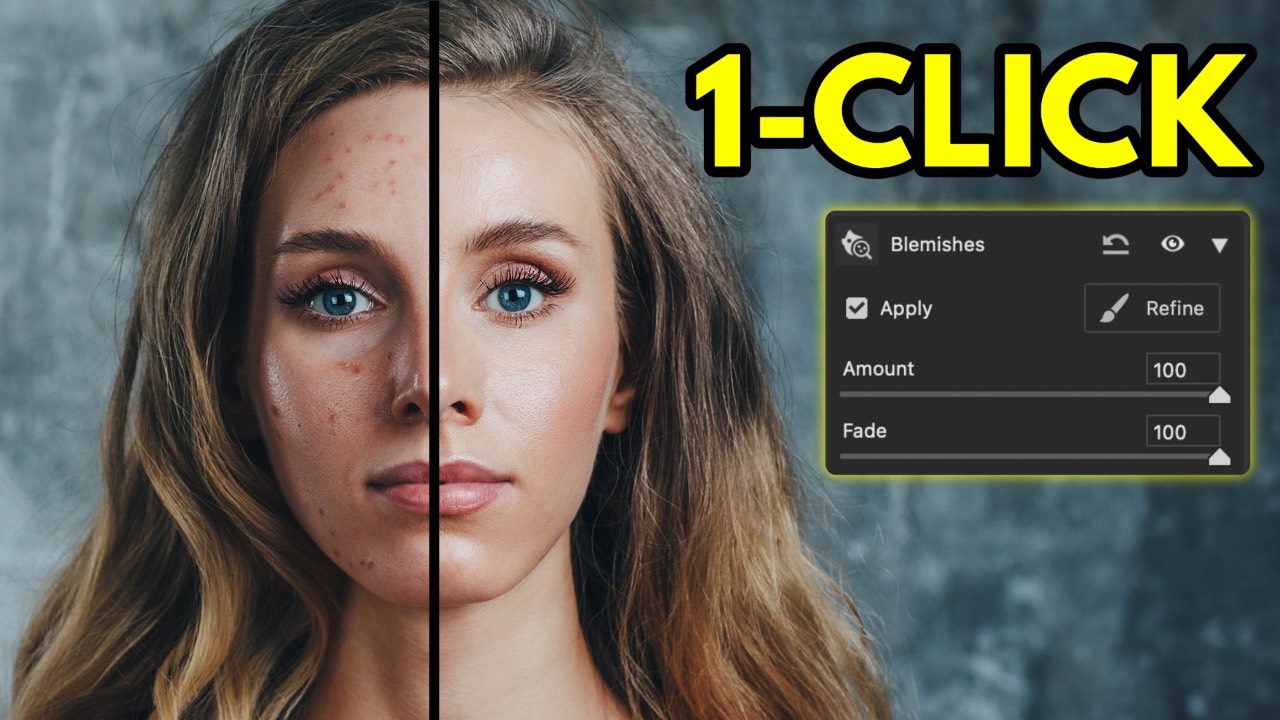
Blemish Removal shipped in Lightroom mobile back in October and has now made its way to Camera Raw with some real improvements. You'll find it under the Remove panel, in the Distraction Removal section.
Click Apply and an AI model scans the photo for both temporary blemishes (like acne) and permanent marks (moles, freckles). Two sliders control the result:
- Amount controls temporary blemishes. Every detected spot gets a prominence score, and as you lower the slider, spots with the lowest scores get restored first. Push it up and you're removing the highest-prominence spots too.
- Fade controls the visibility of permanent marks. Push it right and freckles and moles fade out; pull it left and they're fully restored.
If the automatic detection gets something wrong, hit Refine. This shows an overlay of every detected spot, and you can use the eyeball icon to preview before deciding. From there, use Restore to bring back specific spots you want to keep untouched by the Fade slider, or Remove to manually paint over things the model missed, with an adjustable brush size.
For photos with multiple people, ACR runs person detection and gives you a separate thumbnail per person, each with its own independent Amount and Fade controls. So you can lighten someone's fade on the left side of the frame without touching the person on the right.
One detail worth noting: the tool does a solid job of preserving natural skin texture rather than smoothing everything into a plastic-looking finish, which is usually where blemish removal tools fall apart.
If you're working through a batch of photos of the same person, you can copy the blemish settings from one image (Copy Selected Edit Settings, with Modified selected and Blemishes checked) and paste onto the rest. Detection still runs separately on each photo, but you save time dialing in the sliders repeatedly.
A Preference Toggle for Generative AI Features
Worth flagging: in Preferences (the gear icon), there's a Generative AI section with a checkbox for "Enable generative AI features." Turning it off disables Gen Remove, Gen Expand, and Distracting People Removal entirely, since all three use Firefly.
If you've already applied generative edits to a photo and then turn this off, ACR warns you that you'll lose access to modify those edits (like previously generated variations) until you turn the feature back on. It's a straightforward way to keep those tools out of your workflow entirely if that's a preference for you.
The Only Course Designed to Help You Use Lightroom Everywhere!


