All The Ways To Batch Apply AI Denoise Using Lightroom (June 2025 Update)
If you’ve been frustrated by Lightroom cluttering your library with derivative DNGs every time you applied AI Denoise or Super Resolution, there’s good news: the latest update to Lightroom changes everything. With the new non-destructive enhance workflow, Denoise can now be applied directly to your original RAW files—no duplicates, no confusion. But while this new behavior simplifies file management, it also introduces some changes to how batch processing works. This post walks through everything you need to know.
Why This Matters
Before the update, using Denoise meant creating new DNG files for every photo you enhanced. These files preserved a snapshot of your RAW edits at that moment in time—but any changes made afterward wouldn’t carry over, leading to confusion and inconsistency in your edits. Also, if you realized that you weren't happy with the Denoise results, you couldn't adjust the strength without creating an entirely new DNG file. With the non-destructive approach, Denoise is applied directly into the RAW file’s metadata, keeping your edits in one place and reducing visual clutter.
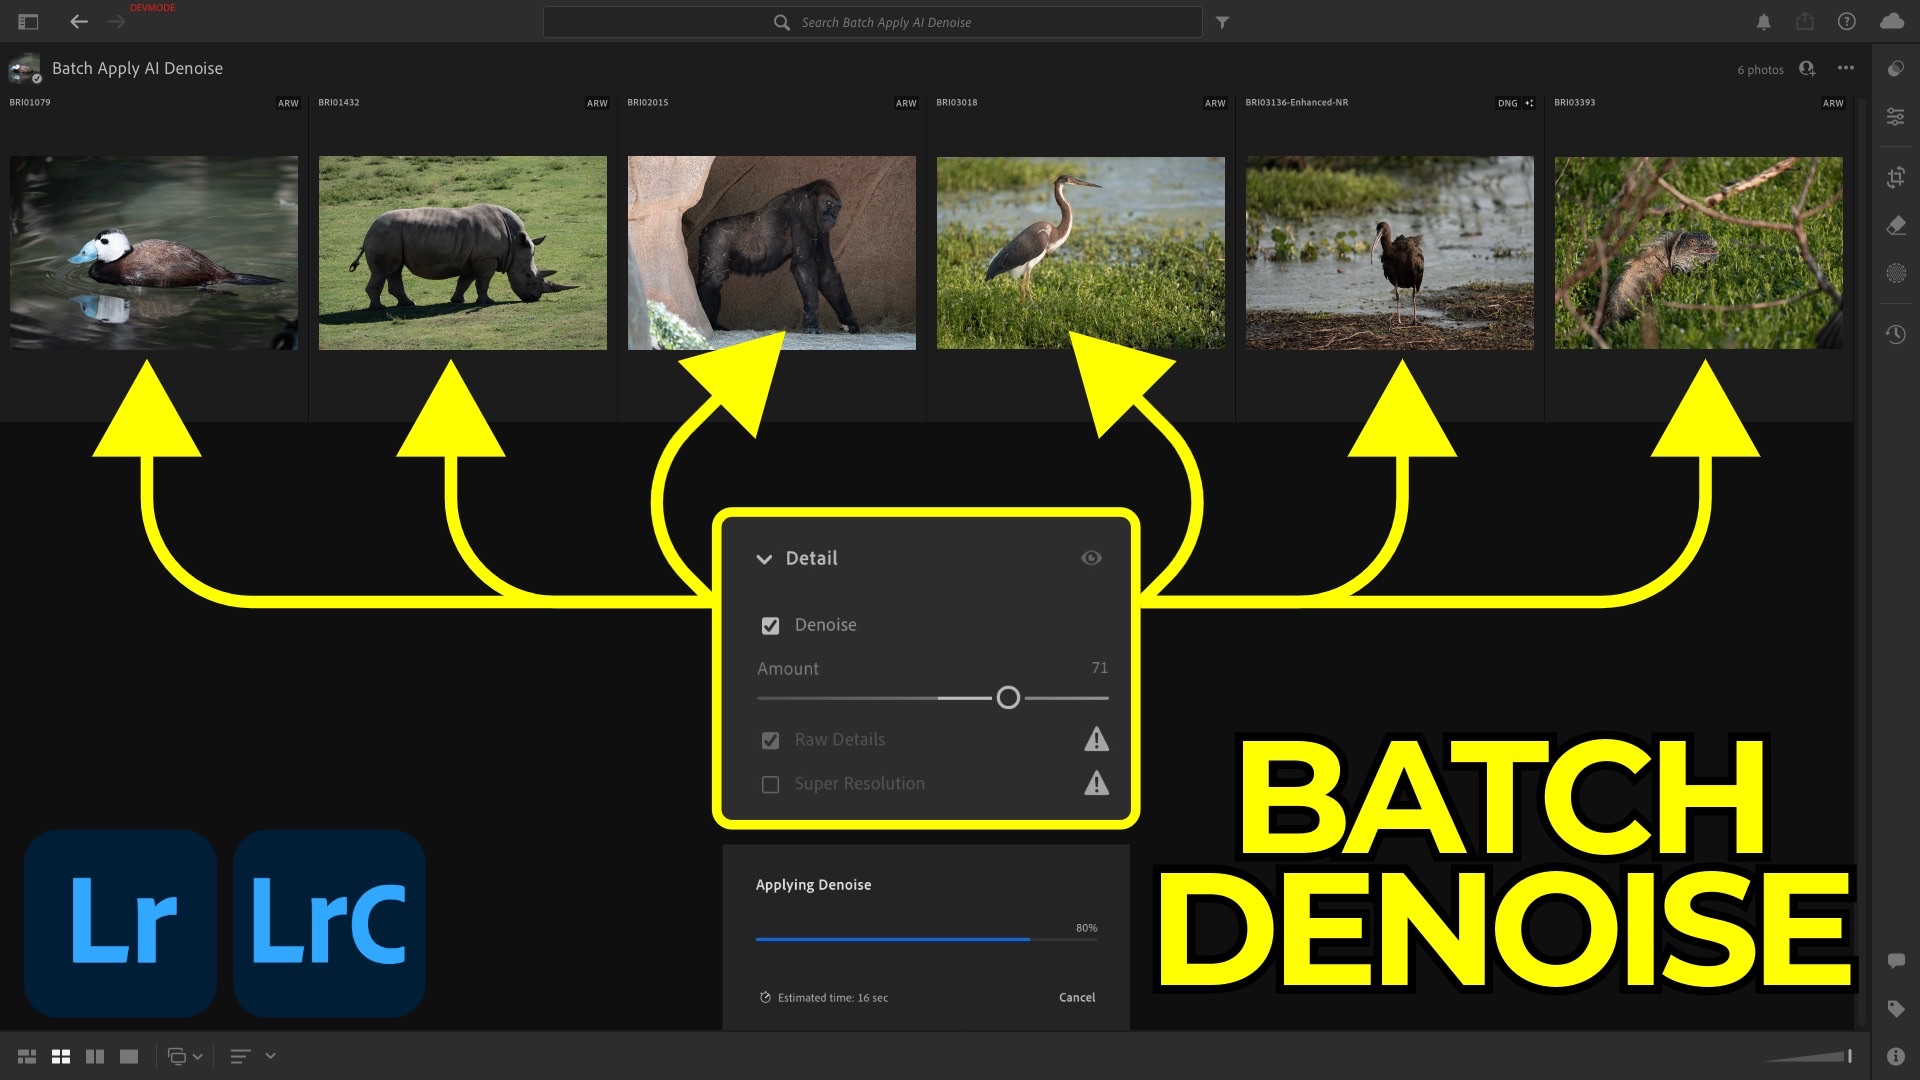
But that change comes with a tradeoff: Lightroom now locks you out of editing while it applies Denoise in batch. This isn’t a bug—it’s an intentional design to preserve image integrity and optimize system performance.
Why Lightroom Locks During Batch Denoise
There are two main reasons for this lock:
-
System Resources: AI-based denoising is demanding. On high-resolution RAW files, the task can max out your system's CPU and GPU. Blocking additional edits during processing helps Lightroom complete the task faster and more reliably.
-
Edit Order Integrity: Denoise modifies every pixel in the image. If you apply other AI tools (like Lens Blur or Generative Remove) while Denoise is still running, it could invalidate those pixels. Lightroom’s AI Edit Status panel helps you manage this now, but preventing overlapping operations eliminates the risk of broken edits.
If you follow Adobe’s recommended order of operations, you’ll avoid most issues. Denoise should come first, followed by other AI-based or pixel-specific edits.
7 Ways to Batch Apply Denoise
Lightroom Desktop (2 Methods)
-
Copy and Paste Settings
-
Apply Denoise to one image.
-
Copy only the Denoise setting using the gear icon > Select Modified.
-
Select other photos and paste the settings.
-
-
Use a Preset
-
Create a preset with just the Denoise setting enabled.
-
Select your images, then apply the preset from the Presets panel.
-
Lightroom Classic (5 Methods)
-
Copy and Paste Settings
-
Same concept as Desktop. Use
Settings > Copy Settingswith only Denoise selected, thenPaste Settingson your other images.
-
-
Preset
-
Create a preset with Denoise only.
-
Apply it using the Quick Develop panel in the Library module.
-
-
Sync
-
Select your primary edited image and the rest of your batch.
-
Use the Sync button in Develop, choosing only the Denoise setting.
-
-
Auto Sync
-
Turn on Auto Sync using the switch next to the Sync button.
-
Any Denoise changes made to the primary image are automatically applied to all selected images.
-
-
Paste Settings from Previous
-
Select a batch of images after editing one.
-
Use
Photo > Develop Settings > Paste Settings from Previous.
-
Wrapping it Up
This new workflow simplifies your catalog and keeps edits consolidated in your RAW files. While it might be frustrating to wait during batch processing, it’s a necessary tradeoff for maintaining both edit accuracy and system stability—especially when applying heavy AI tasks like Denoise.
Whether you use Lightroom Desktop or Classic, you now have multiple ways to batch enhance your images without filling your library with duplicate files. Hopefully, this guide clears up some confusion and helps you make the most of the new workflow.
For a deeper dive into everything added in Lightroom 8.4, check out this article covering all the highlights.
It's Time to Learn How To Use Lightroom Everywhere!

If you enjoyed this topic and want to learn how to get the most out of Lightroom's cloud-based ecosystem on the desktop, smartphone, and tablet, then you should check out my Lightroom Everywhere course! It has over nine hours of easy-paced lessons that'll teach you how to make the most out of Lightroom Desktop, Mobile, and Web.
The Only Course Designed to Help You Use Lightroom Everywhere!


