
I’ve become a bit obsessed with this creative Photoshop technique
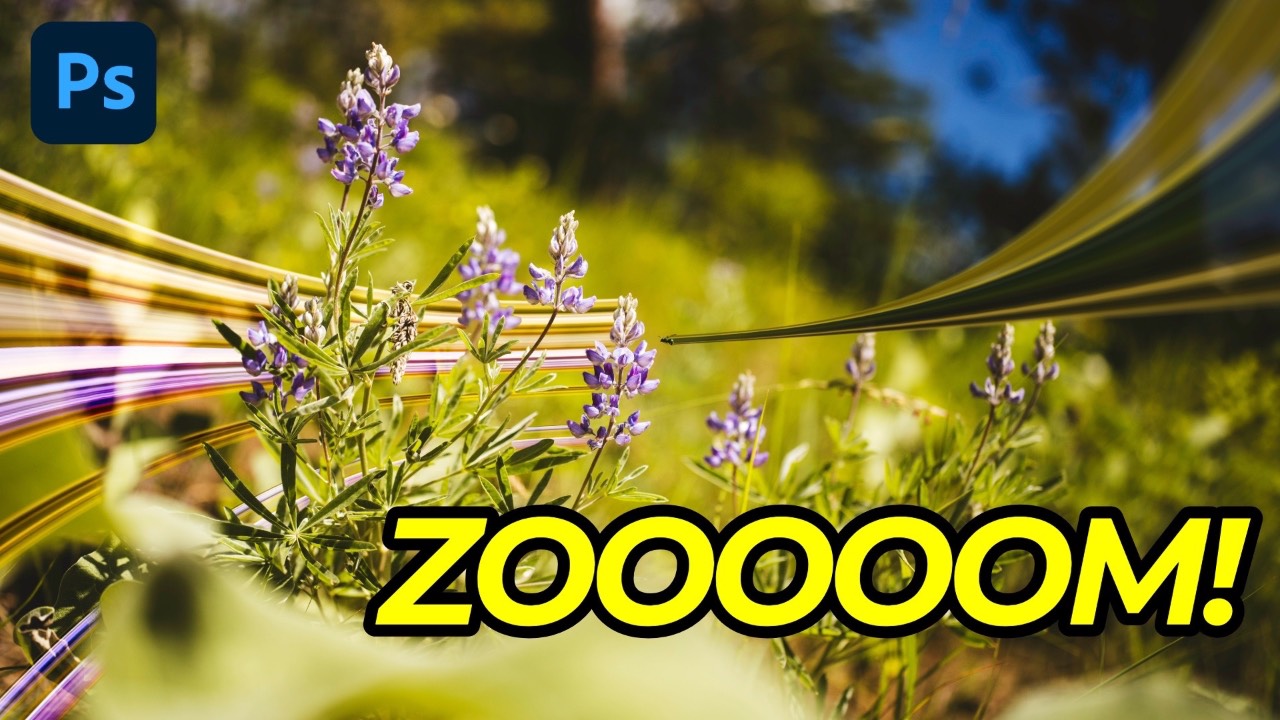
If you edit almost exclusively in Lightroom, you might wonder whether Photoshop earns its place in your workflow. For straightforward edits, probably not. But Photoshop's layer-based approach opens up creative techniques that Lightroom simply isn't built for — and pixel stretching is a good example.
What Is Pixel Stretching?
Pixel stretching takes a single-pixel-wide slice of your subject and distorts it into a streak, creating a motion-blur or glitch-like effect that radiates outward from the subject. It works best when your subject has a well-defined outline and bold, saturated colors — the stretched pixels carry that color across the frame, so the more interesting the cross-section, the better the result.
Like most Photoshop techniques, there's no single correct way to do it. The core mechanic is simple, but the creative possibilities — warping, layering multiple stretches, blending modes — are where it gets interesting.
The Basic Technique
Isolate your subject. Go to Select > Select Subject. Photoshop will automatically identify the main subject in your photo. Once selected, press Command+J (Mac) or Control+J (Windows) to copy it onto its own layer. Rename the layer — you'll appreciate it once you have several going at once.
Make a one-pixel selection. Click and hold the Marquee tool to reveal the flyout menu. You'll find two tools you've probably never touched: the Single Row Marquee and Single Column Marquee. Use Single Column for a vertical stretch. Click on your subject layer to place a one-pixel-wide vertical selection somewhere that runs through a meaningful part of your subject. Since you're working on the subject layer, the selection only affects that layer — not the background behind it.
Create the stretch layer. With the one-pixel selection active, press Command/Control+J again. This creates a new layer containing just that sliver. Rename it something like "Pixel Stretch." Then move your original subject layer above this new sliver layer — the full subject sits on top, the stretch underneath.
Distort. Select the pixel stretch layer — not the subject layer. Go to Edit > Transform > Distort. Drag the control point outward to stretch the sliver into a streak. Angling the stretch to match the direction or tilt of your subject tends to look more intentional than dragging straight out. Click the checkmark to commit. At this point you have a working pixel stretch — that's the whole mechanic.
Taking It Further
Multiple stretches. Repeat the selection-and-distort process on different parts of the same subject. Each one-pixel selection captures a different cross-section, so stretching multiple areas creates layered, varied streaks rather than one uniform effect. A selection through the middle of a subject looks different from one at the edge.
Warp tool. Instead of distorting in one direction, go to Edit > Free Transform, then click the warp icon in the options bar. This lets you grab specific points on the stretch and pull them independently — curving the streak, bending sections, or pulling corners at different angles. Zoom out before warping; it makes the effect much easier to control.
Smaller or isolated subjects. For subjects like an insect or a single flower, Select Subject often grabs too much of the frame. Use the Object Selection Tool instead — draw a rough bounding box around just the area you want, and Photoshop will refine the selection to the subject edge.
Masking for depth. Select your background layer, use the Object Selection Tool to select the subject area, then switch to your pixel stretch layer and click the mask icon. Invert the mask with Command/Control+I. This pushes the stretch behind parts of the subject, creating a sense of depth. Refine further with a black brush (press B) to bring back or hide areas of the stretch precisely.
Blending modes and duplicates. Group your stretch layers with Command/Control+G and experiment with blending modes like Soft Light or Hard Light. These can make the effect feel more embedded in the image. Duplicating a stretch layer (Command/Control+J) is a quick way to add intensity — it deepens the color without redoing the distortion.
The Only Course Designed to Help You Use Lightroom Everywhere!


