Why Lightroom's AI Edit Workflow Matters More Than You Think
Over the past few years, Lightroom has added a wide range of AI-powered editing tools. Features like Generative Remove, Reflection Removal, and Denoise open up possibilities that once seemed impossible. But as powerful as these tools are, the way you apply them matters. The order in which you use AI edits can change your results—and in some cases, even require Lightroom to regenerate work you may have already factored into your edit.
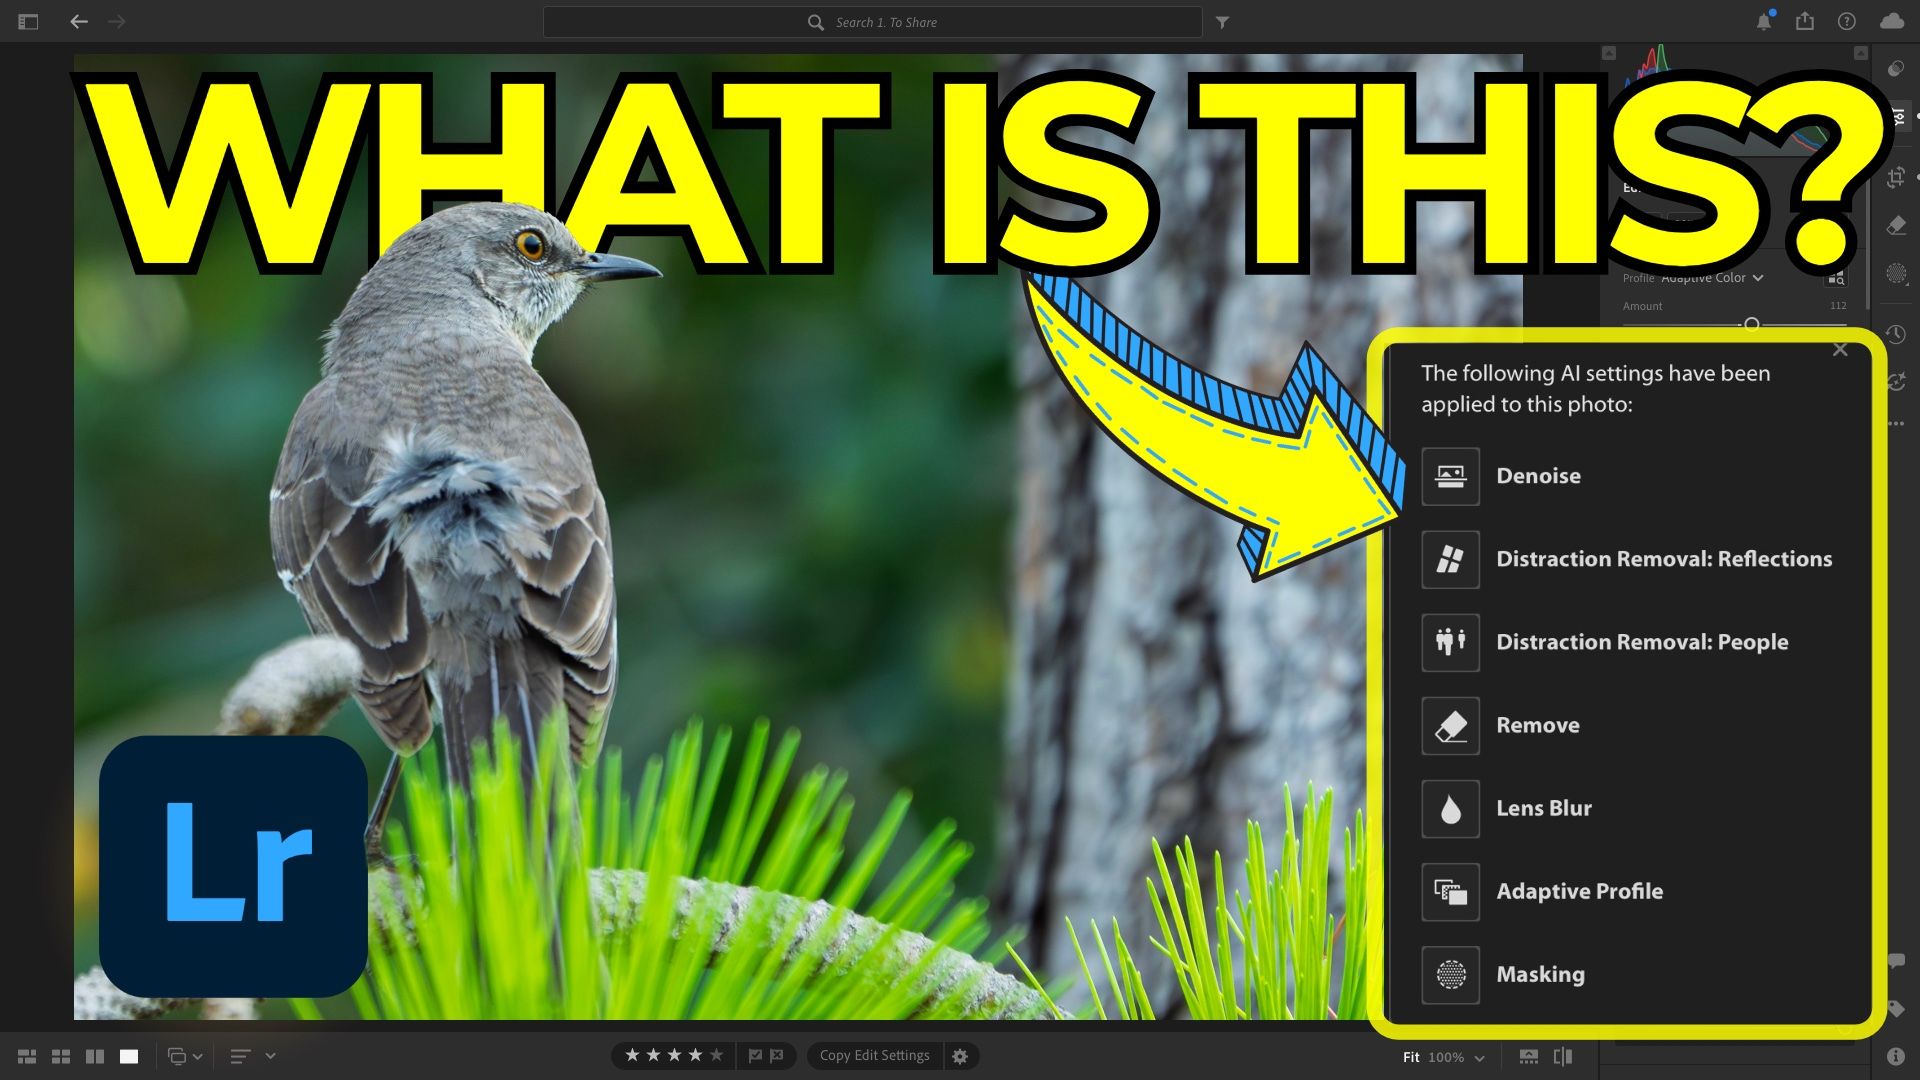
This is where the AI Edit Order of Operations comes in. Think of it as a recommended sequence for applying AI tools so you avoid unexpected issues. Lightroom now includes an AI Edit Status menu that helps you keep track of which tools you’ve used, whether they’re applied in the right order, and what needs to be updated if something goes out of sequence.
Before we jump in, it's important to remind you that you don't have to follow this AI order of operations list. Think of this as more of a recommendation or guidance than a requirement. I promise you that I often go way out of order when I edit my photos, and I've never run into any significant consequences as a result. With that said, there is value in understanding what the order of operations is and how it can fit into your editing workflow
Why Order Matters
If you’ve ever applied an edit and later noticed parts of your image looked strange or perhaps darker than they should be, you’ve probably run into invalidated pixels from an AI edit that needs to be updated. For example, if you apply Generative Remove and then go back and add Denoise (which is further upstream in the operations list), Lightroom will regenerate new variations of your Generative Remove edits. That might be fine, but if you really liked the first result, losing it can be frustrating.
Similarly, applying Reflection Removal or other tools out of order can create artifacts or unexpected shifts in the image. Fortunately, Lightroom highlights invalidated edits in yellow so you can see what needs attention. Updating those tools often fixes the problem, but it may also trigger new results.
The AI Edit of Operations
Following this sequence ensures your edits build on each other instead of undoing or invalidating earlier work.
- HDR
- Denoise, Raw Details, Super Resolution
- Distraction Removal: Reflections
- Distracting Removal: People
- Distraction Removal: Dust (Currently available only in Adobe Camera Raw as Early Access)
- Generative Expand (Currently available only in Adobe Camera Raw as Tech Preview)
- Generative Remove, Content-Aware Remove, Heal, and Clone
- Lens Blur
- Lens Profile
- Crop and Transform
- Adaptive Profiles
- Global Adjustments
- Masking*
(Bolded items are AI-powered tools. *Adaptive masks—Subject, Sky, etc—in the Masking panel are AI-powered)
Lightroom and Camera Raw Together
Some AI tools, like Dust Removal and Generative Expand, are currently exclusive to Adobe Camera Raw. The good news is that Lightroom recognizes these edits when you bring the file back in. The catch is that the order of operations is even more important in a mixed-app workflow. For example, applying Denoise after using Generative Expand in Camera Raw will remove your expanded canvas because that tool is not currently in Lightroom. It can render those pixels from Adobe Camera Raw, but it currently cannot update them. To avoid this, make sure you apply upstream edits like Denoise before moving into downstream tools like Expand.
Building Good Habits
At first, keeping track of the order may feel overwhelming. A practical approach is to always ask: Does this edit belong early in the process or later? If you use Denoise often, make it one of your very first steps. If you know you’ll be using Generative Remove, apply it before moving on to profiles or masks.
Over time, the workflow becomes second nature. Lightroom’s AI Edit Status menu helps guide you, and once you’re familiar with it, you’ll be able to apply AI edits confidently without worrying about losing progress.
It's Time to Learn How To Use Lightroom Everywhere!

If you enjoyed this topic and want to learn how to get the most out of Lightroom's cloud-based ecosystem on the desktop, smartphone, and tablet, then you should check out my Lightroom Everywhere course! It has over ten hours of easy-paced lessons that'll teach you how to make the most out of Lightroom Desktop, Mobile, and Web.
The Only Course Designed to Help You Use Lightroom Everywhere!


