The One Lightroom Tool That Changed This Whole Wildlife Edit
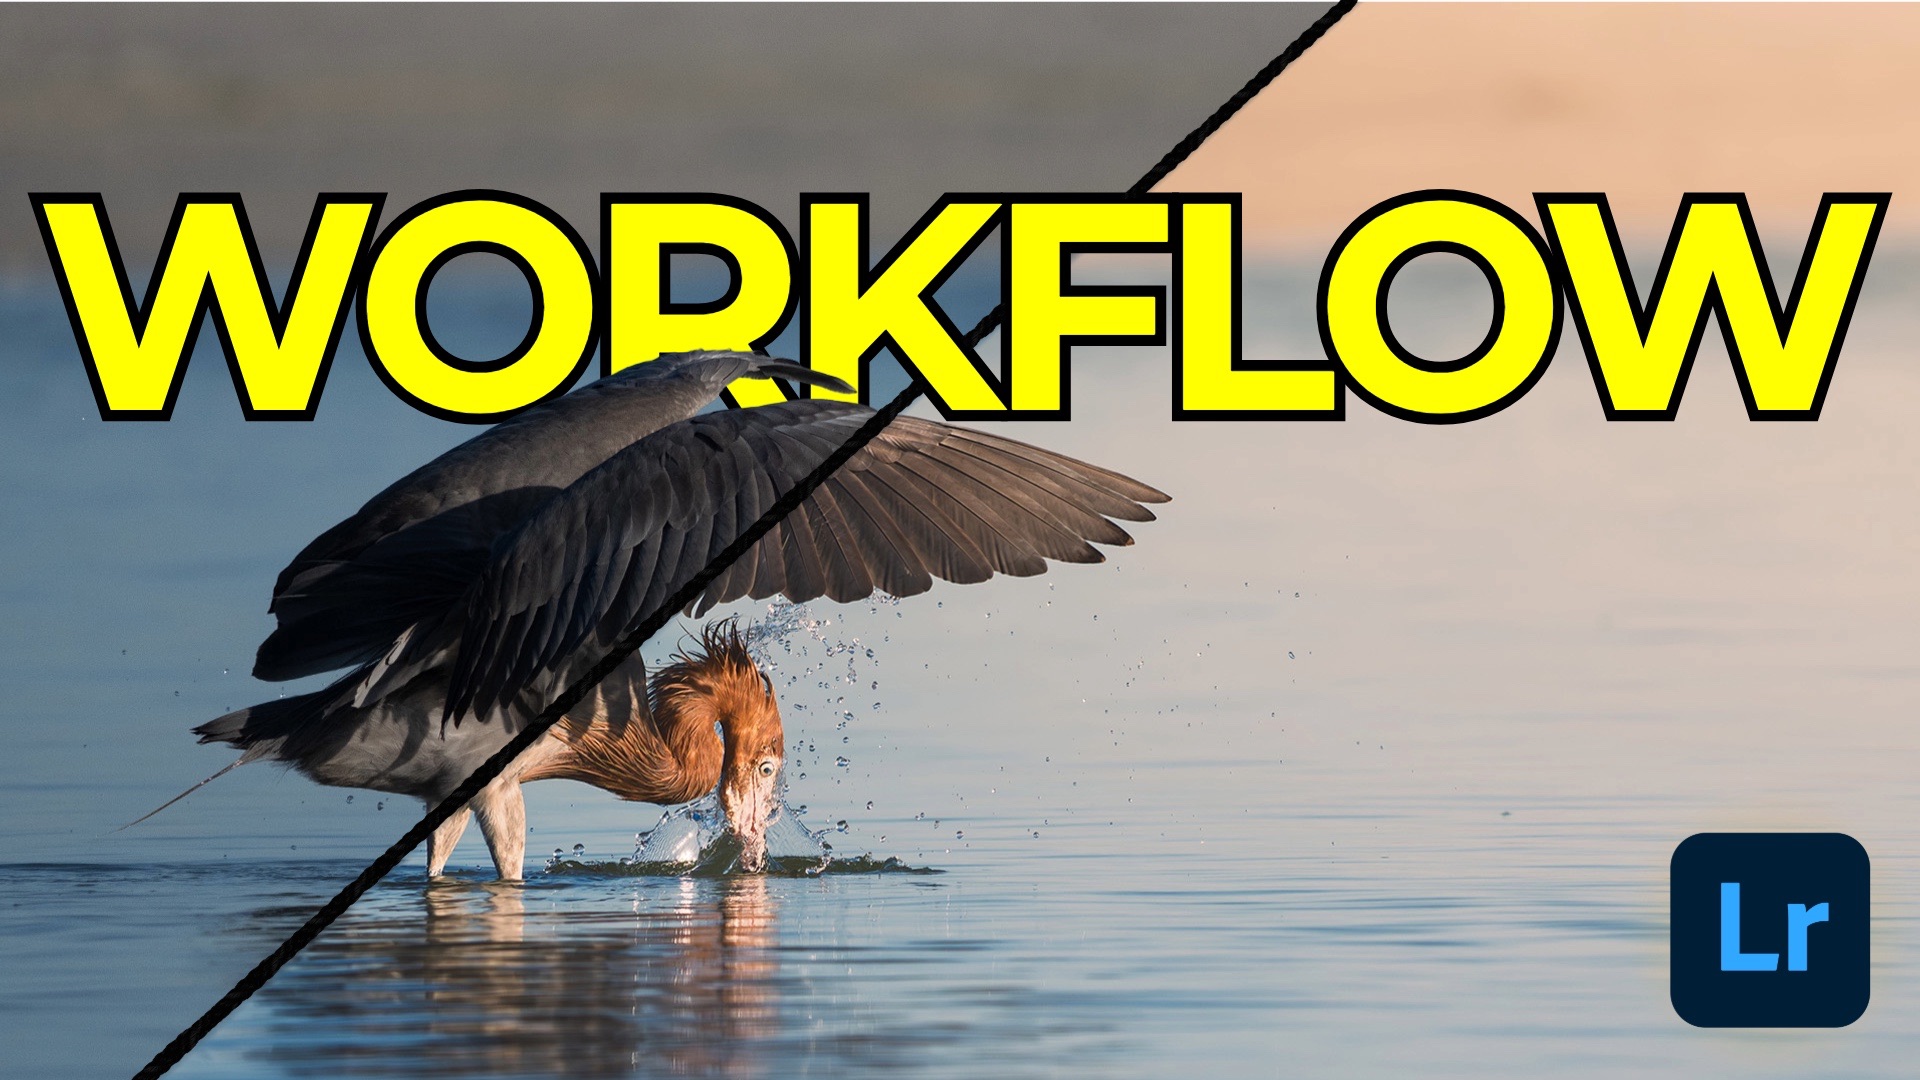
Back in April, I finally got my hands on the truly spectacular Sony 400–800mm lens and paired it with my Sony a1 II. Naturally, I wanted to put it to the test right away, so I met up with my buddy Matt Kloskowski for a sunrise bird shoot. That morning, a reddish egret gave us the kind of performance you hope for—darting and lunging through the shallows in pursuit of a sushi breakfast. I took thousands of shots, and in this post, I’m going to walk you through how I edited one of my favorites.
This isn’t just a before-and-after walkthrough. It’s about the thought process behind every slider move, the technical choices around masking and sharpening, and even a few creative flourishes at the end. Whether you're a Lightroom Desktop or Classic user, everything I cover applies to both.
Starting With a Solid Raw Base

The photo was taken at 800mm, ISO 800, f/8, and 1/3200s. I intentionally bumped up the ISO to freeze the action of the egret bursting through the water. Before touching any tonal sliders, I applied Denoise right away—following the AI Edit Order of Operations. I used the newer method that applies Denoise directly to the raw file (no more extra DNGs!) and dialed in a subtle amount that kept fine feather detail while minimizing noise.
Building a Strong Foundation with Adaptive Tools
Instead of clicking Auto, I opted for the Adaptive Color profile and reduced its intensity using the Amount slider to get a good base look. White balance was left “As Shot” since it was already spot-on. I then applied a modest crop to refine the composition while keeping the original aspect ratio intact.
From there, I made some minor exposure tweaks, but most of the real tonal magic came from the Point Curve. I dropped a few anchor points to control shadows, highlights, and midtones, and slightly lifted the black point to soften the darkest areas—introducing just a hint of gray.
Subtle Saturation Control and Color Calibration
Because point curve edits tend to boost saturation, I used the Refine Saturation slider to dial things back slightly—usually hovering around 50. Then I hopped into the Color Calibration panel to give the image more punch. I bumped up the Blue Primary and Red Primary Saturation sliders. These adjustments are way more forgiving than cranking saturation in the HSL panel.
Masking for Detail and Separation
Using Adaptive Subject Masking, I isolated the egret and added texture to make its plumage pop. I also used a Duplicate and Invert technique to create a second mask for the background, applying a small amount of Dehaze to help the egret stand out even more.
This kind of local contrast control is one of my favorite uses of masking—it’s subtle but impactful.
A Touch of Creativity: Sunrise Glow
To lean into the early morning vibe, I added a large Radial Gradient Mask to simulate warm sunlight. I used negative Dehaze to create a soft, glowing haze and warmed things up with the Temp and Saturation sliders. The result? A more immersive mood without feeling overprocessed.
Finishing Touches: Sharpening and Clean-Up
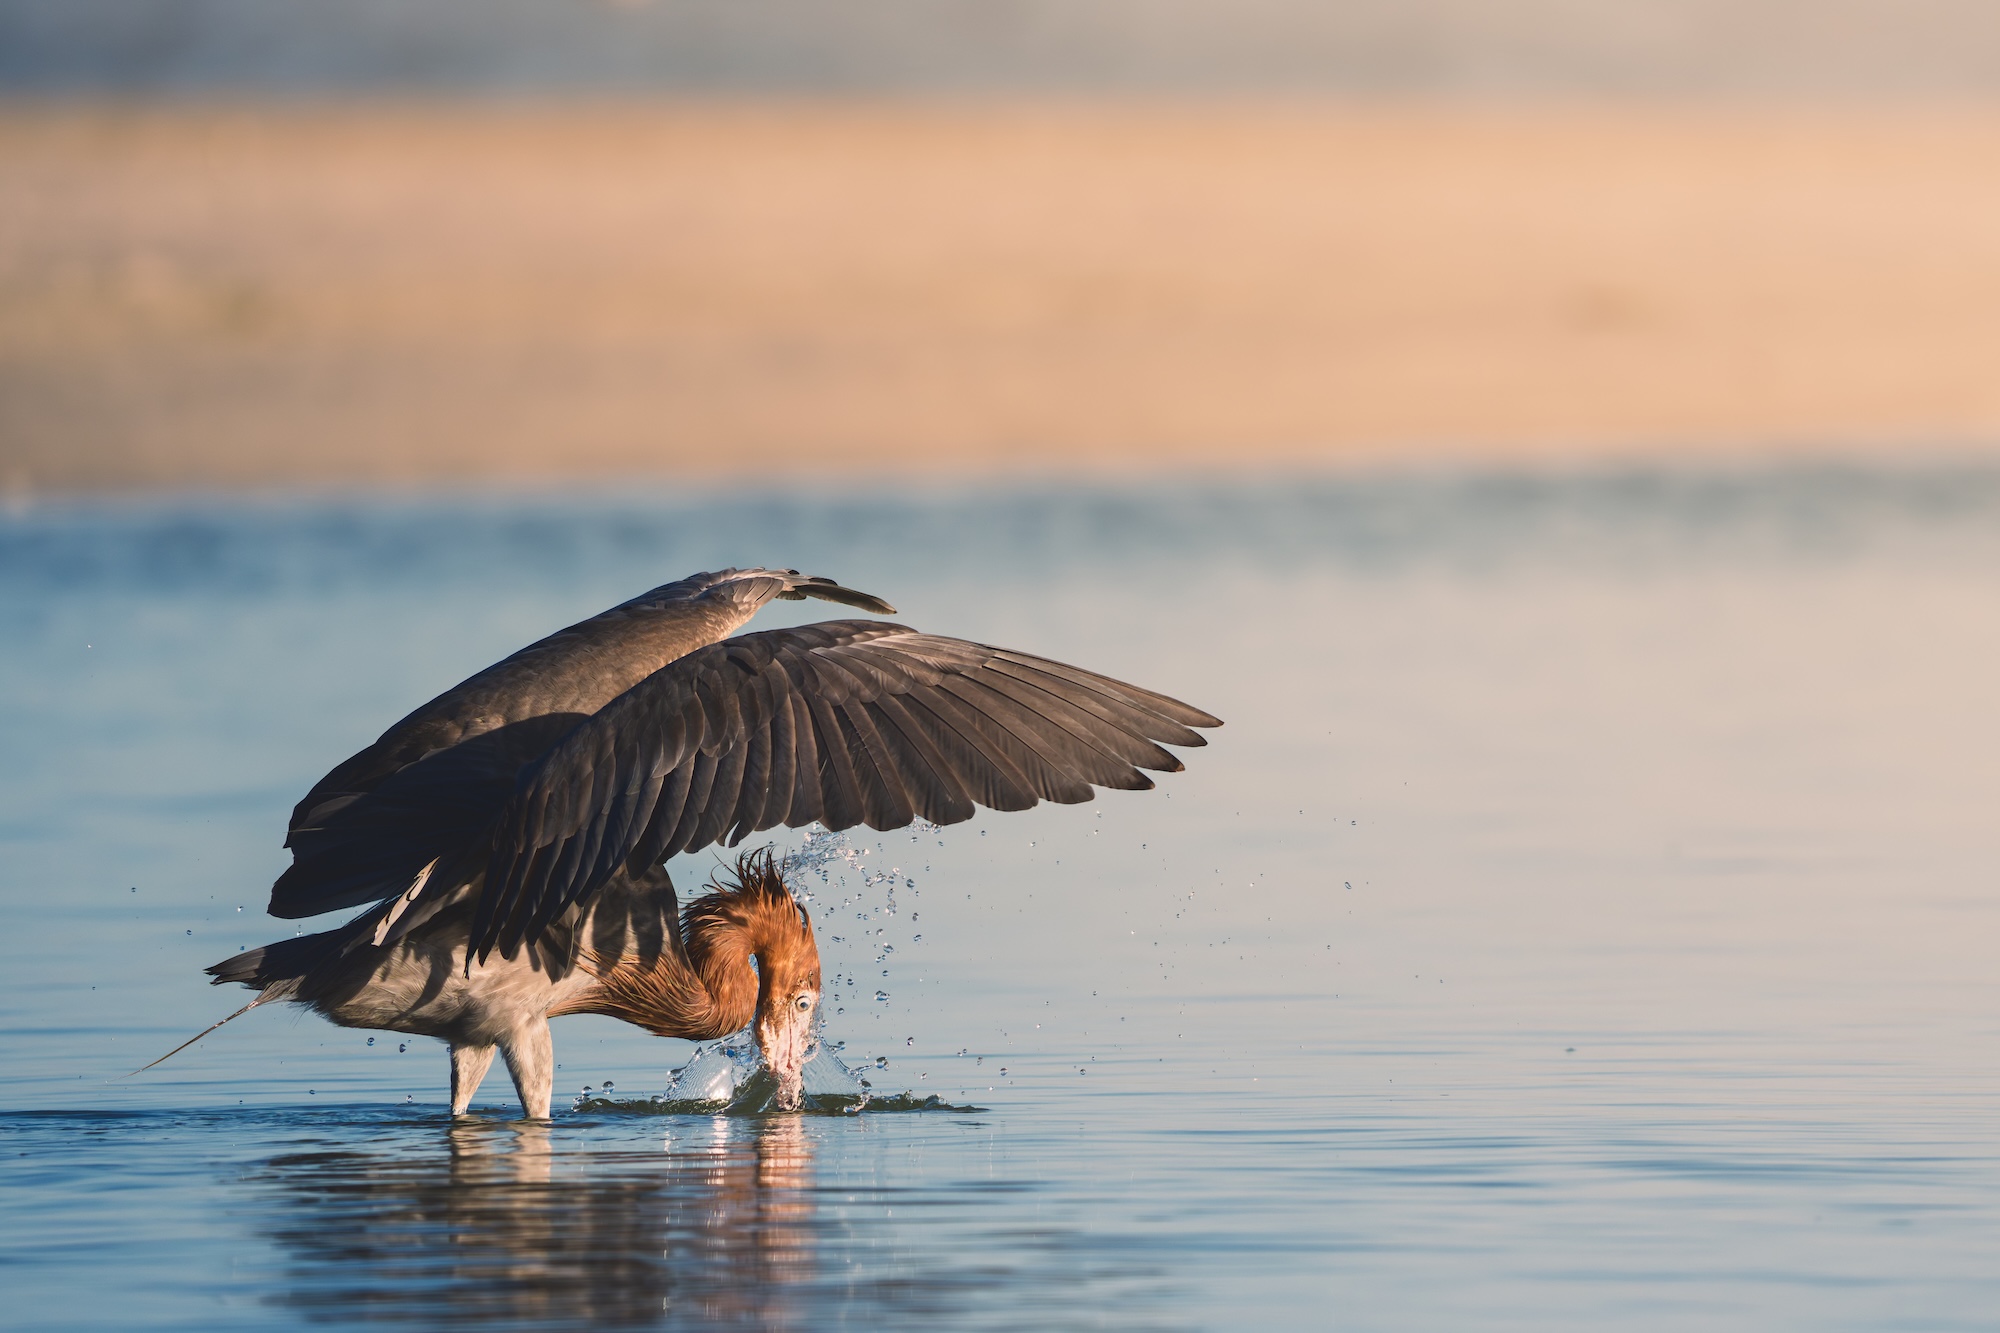
Zooming into the egret, I applied sharpening with a technique that prioritizes edge detail: Radius at 0.5, Detail at 100, and fine-tuning the Masking slider with the Option/Alt key to restrict sharpening to high-contrast edges.
Lastly, I used the Remove tool to get rid of a distracting bright spot in the background—and updated my AI edit status to keep everything in sync.
Bonus Tip: Generative Expand in Photoshop
The bird was a bit too close to the left edge of the frame for my taste, so I jumped into Photoshop’s Generative Expand feature to add just a bit of extra room. It was a minor tweak, but it made the final image feel more balanced.
It's Time to Learn How To Use Lightroom Everywhere!

If you enjoyed this topic and want to learn how to get the most out of Lightroom's cloud-based ecosystem on the desktop, smartphone, and tablet, then you should check out my Lightroom Everywhere course! It has over 11 hours of easy-paced lessons that'll teach you how to make the most out of Lightroom Desktop, Mobile, and Web.
The Only Course Designed to Help You Use Lightroom Everywhere!


